A. Main Setup:
- Open the HTTP Injector app
- Select SSL/TLS + SSH as the connection mode
- Enable Custom Payload
- Tap Save
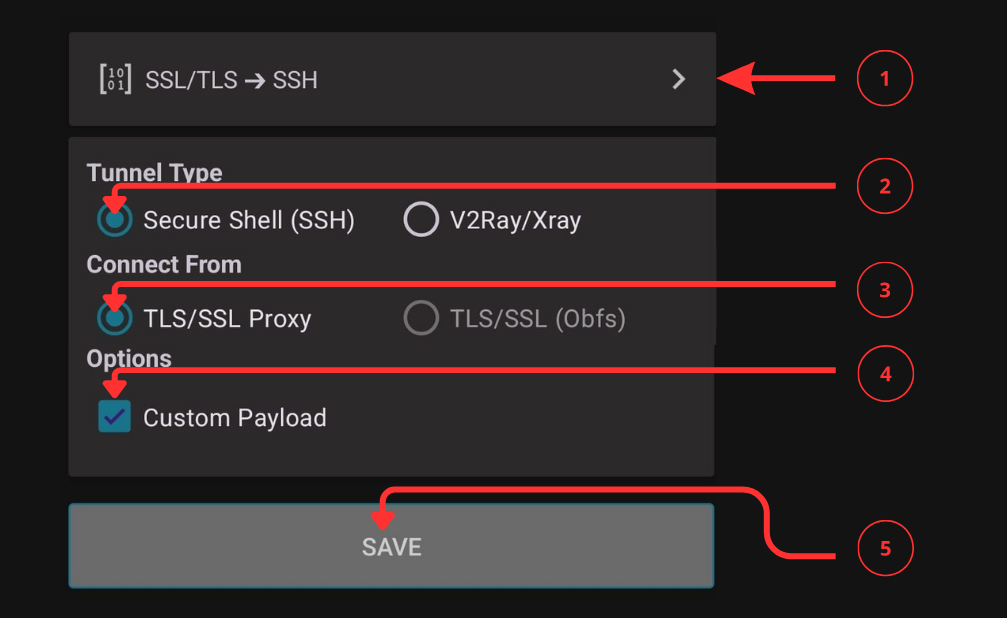
Paste your generated payload
Complete guide to bypass restrictions and connect through zero-rated services using HTTP Injector files.
If you're looking for a reliable way to browse the internet for free, learning how to create HTTP Injector files using SSL/TLS is one of the most effective methods in 2025. This technique allows you to bypass restrictions and connect through zero-rated services by your mobile provider using HTTP Injector files.
In this complete guide, you'll learn how to create HTTP Injector files using SSL/TLS step by step even if you're a beginner. Let's get started.
To begin, you need the HTTP Injector app installed on your Android device.
Avoid unofficial versions as they may contain malware or security vulnerabilities.
Once installed, you're ready to create HTTP Injector files using SSL/TLS.
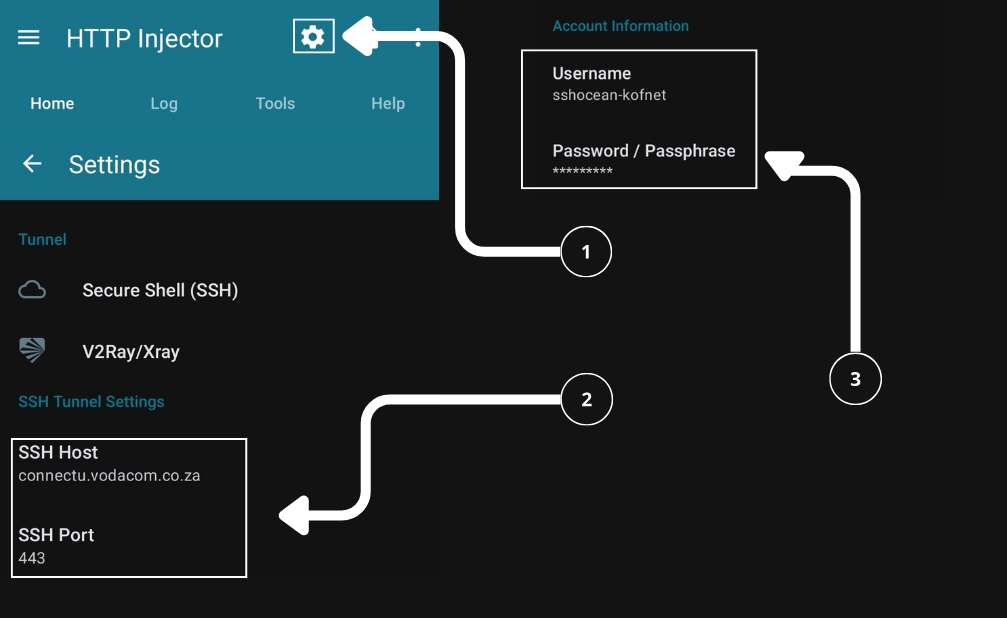
Before configuring the app, you'll need a valid SSH account to tunnel your internet traffic.
Need help creating an SSH account? Check out our complete guide on how to create a free SSH account using SSHOcean.
Use the following trusted sites to create free SSH accounts:
You'll receive:
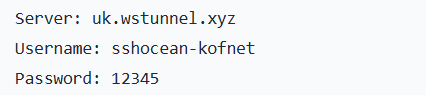
This information will be essential when you create HTTP Injector files using SSL/TLS.
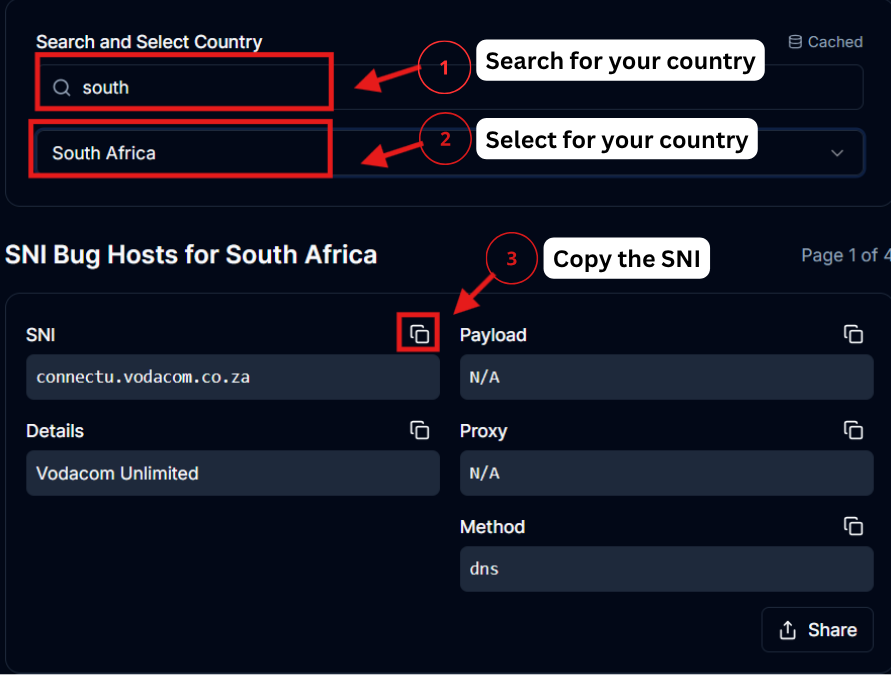
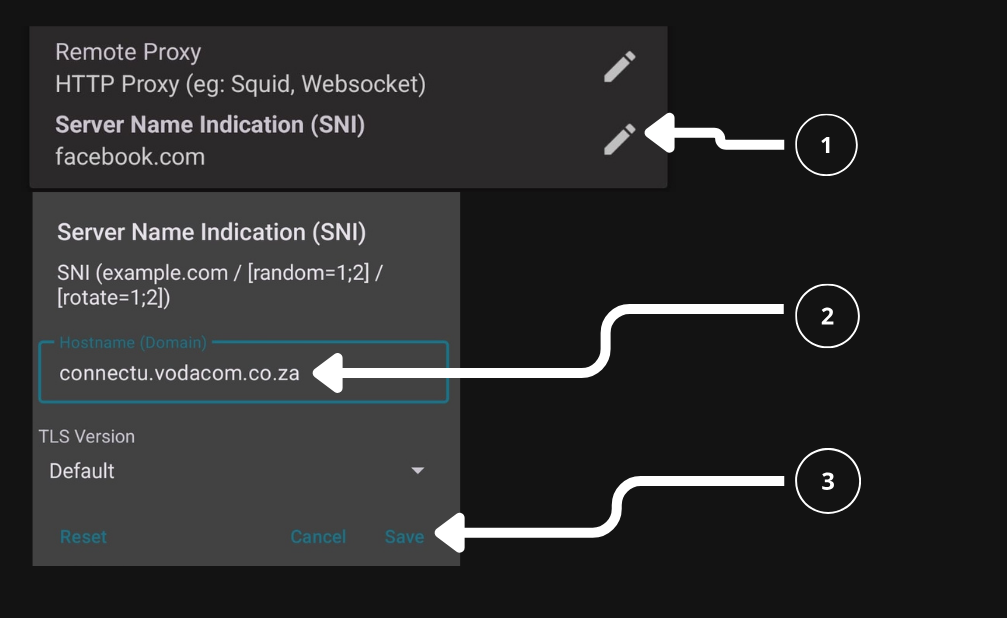
A core part of HTTP Injector files that use SSL/TLS is a valid SNI Bug Host. This is a domain your mobile network allows without charging data.
Use our free SNI Bug Host Generator Tool to:
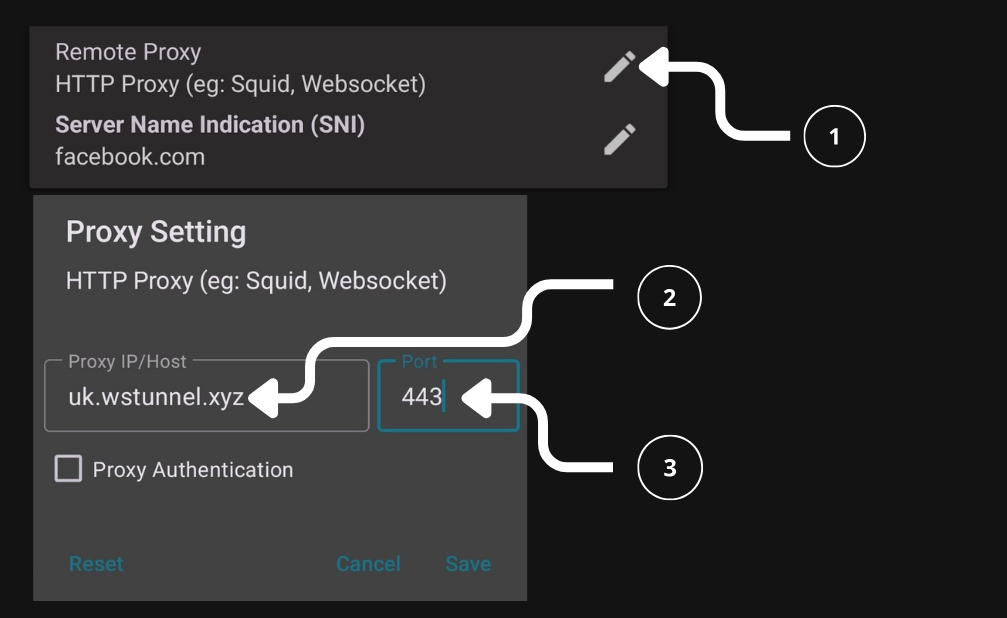
Once you have a valid bug host, you need to generate a custom payload:
GET / HTTP/1.1
Host: your-bughost.com
Upgrade: websocket
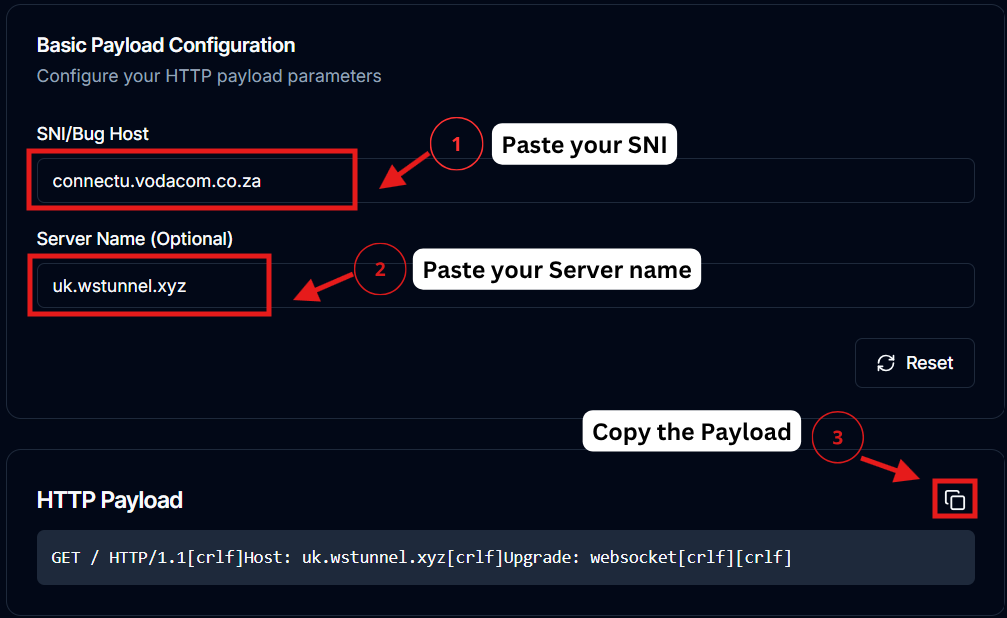
This will be used when you create HTTP Injector files using SSL/TLS in the next step.
Now it's time to build your configuration. Let's walk through the full process of how to create HTTP Injector files using SSL/TLS.
Paste your generated payload
This is how you successfully create HTTP Injector files using SSL/TLS with a working payload, bug host, and SSH server.
Now that your configuration is complete:
Once connected, you can browse the internet using your mobile data - without consuming your actual data bundle - if the bug host is zero-rated.
If your connection fails after trying to create HTTP Injector files using SSL/TLS, here are some things to check:
Some mobile networks are more restrictive than others. Trial and error may be needed when working with HTTP Injector files.
Once you get a working setup, save it so you don't have to repeat the steps.
You can now share this configuration or reload it later. This is how power users build libraries of HTTP Injector files that they can use across different networks and devices.
Free internet access through HTTP Injector files may violate your mobile provider's terms of service. These methods should be used responsibly, for testing and educational purposes only.
Now you've learned how to create HTTP Injector files using SSL/TLS in 2025 - from installation to export. This guide helps you set up a working SSH/SSL tunnel, generate payloads, and use valid SNI bug hosts. With the right combination, you can enjoy free internet access where supported.
Whether you're new to HTTP Injector or just need an updated guide, mastering how to create HTTP Injector files using SSL/TLS is an essential skill for getting connected smartly and securely in 2025.